
29 Jun Stream Your Video: How to Setup Streaming on YouTube
Live video streaming has become increasingly popular and essential in various contexts, and Wavesys WVMS makes it effortless to go live with your presentations, reviews, street cams, or conference broadcasts. With Wavesys WVMS, you can easily stream live video to third-party services using the RTMP protocol. In this guide, we will demonstrate how to set up streaming to one of the most popular platforms, YouTube, allowing you to share your Wavesys WVMS video with a wide audience across different devices.
Before configuring the streaming, there are a few prerequisites to consider:
1. You need a YouTube (Google) account to log in and use the YouTube streaming services
2. The channel in Wavesys WVMS that you plan to use for streaming must be enabled and have H.264 encoding.
3. If you wish to utilize the sub stream (secondary video stream), ensure it is enabled in the channel properties via Wavesys WVMS Console.
4. If you want to include audio in your stream, enable it in the channel properties in Wavesys WVMS.
Let’s proceed with the setup:
1. Open your web browser and navigate to YouTube Live (also known as Creator Studio tools). Sign in to your account to access the service.
2. Choose “Live streaming” in the left menu and click on “Stream now.” If it’s your first-time using YouTube live streaming, you may be prompted to verify your account.
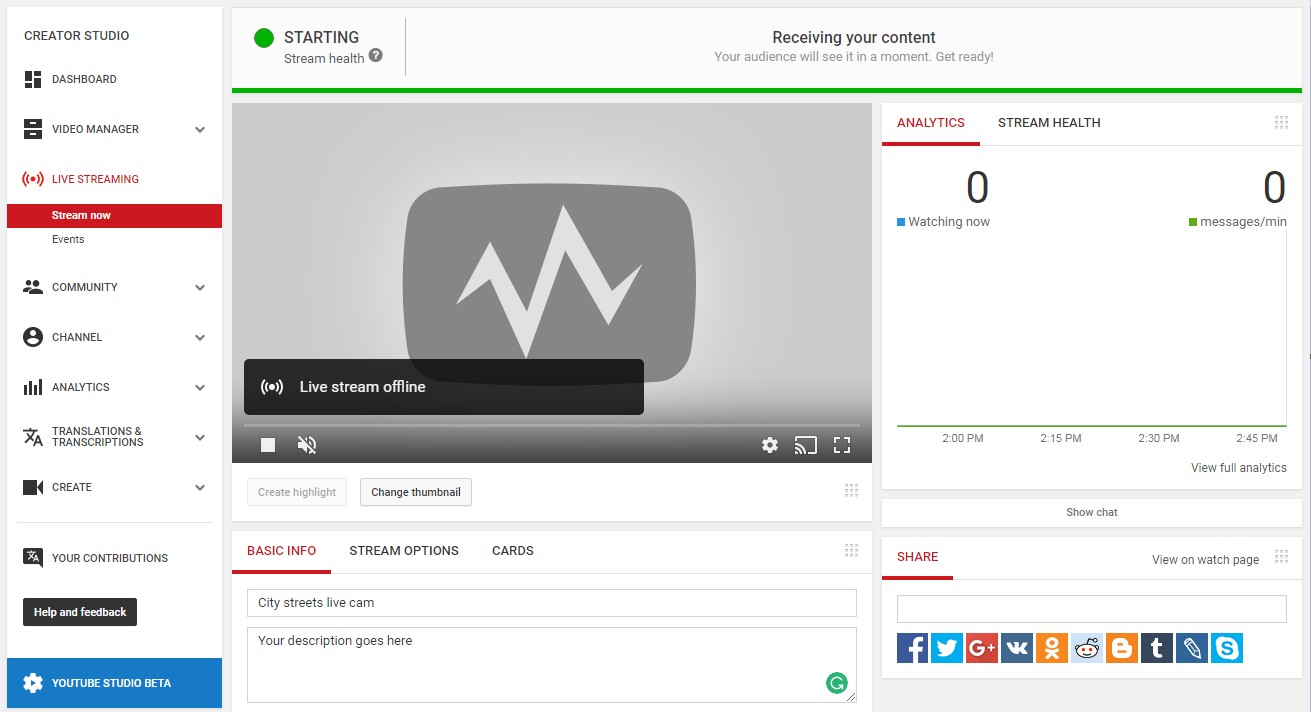
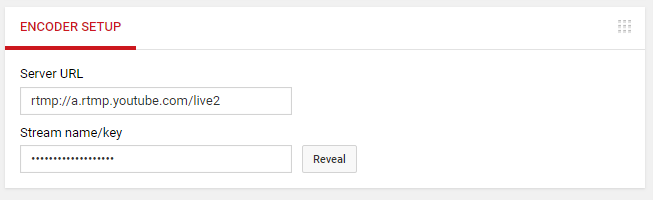
To configure Wavesys WVMS, you need the RTMP URL provided by YouTube. You can find it below the live stream preview under “Basic info.” Scroll down until you see the “Encoder setup” section. Copy both the Server URL and Stream name/key. To reveal the Stream key, click the “Reveal” button next to the Stream key field.
Now, switch back to Wavesys WVMS Console.
1. In the Console application, navigate to the “Configuration” section and select “Live podcasts”
from the left menu.
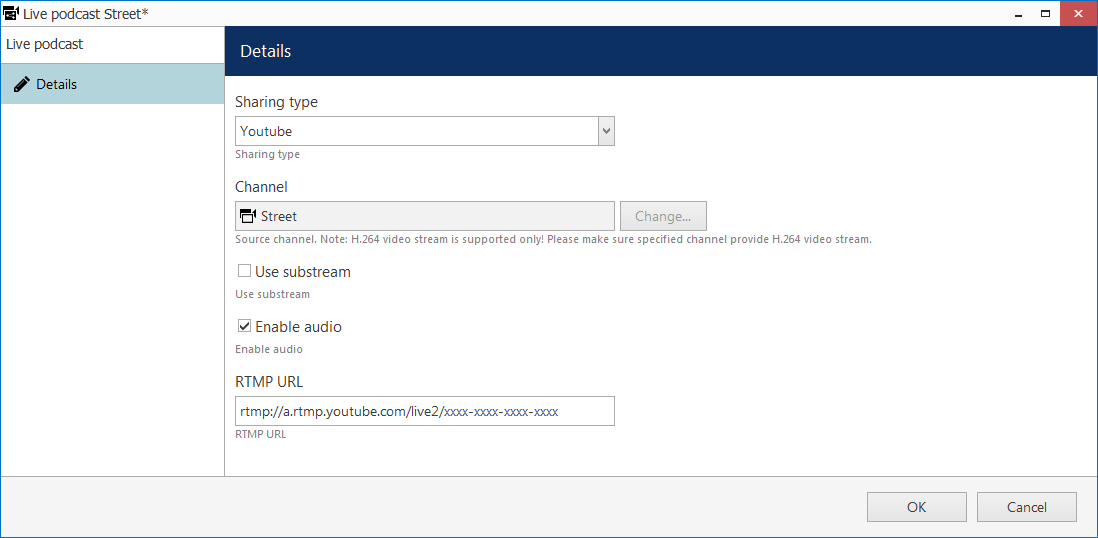
2. Click on the “+ New live podcast” button on the upper panel to open the podcast configuration
dialog box. Fill in the settings:
• Set the Sharing type to YouTube.
• Choose your desired Channel for streaming.
• If you want to use the sub stream, mark the “Use sub stream” option. Otherwise, the main video stream will be used.
• If you want to include audio, mark the “Enable audio” option.
• Paste the RTMP URL provided by YouTube into the RTMP URL field. This URL consists
of the Server URL and Stream name/key obtained earlier from YouTube’s Encoder setup.
The RTMP URL should resemble the following format: rtmp://a.rtmp.youtube.com/live2/xxxx-xxxxxxxx-xxxx, where “rtmp://a.rtmp.youtube.com/live2/” is the Server URL copied from YouTube, and “xxxx-xxxx-xxxx-xxxx” is the Stream name/key from YouTube’s Encoder setup.
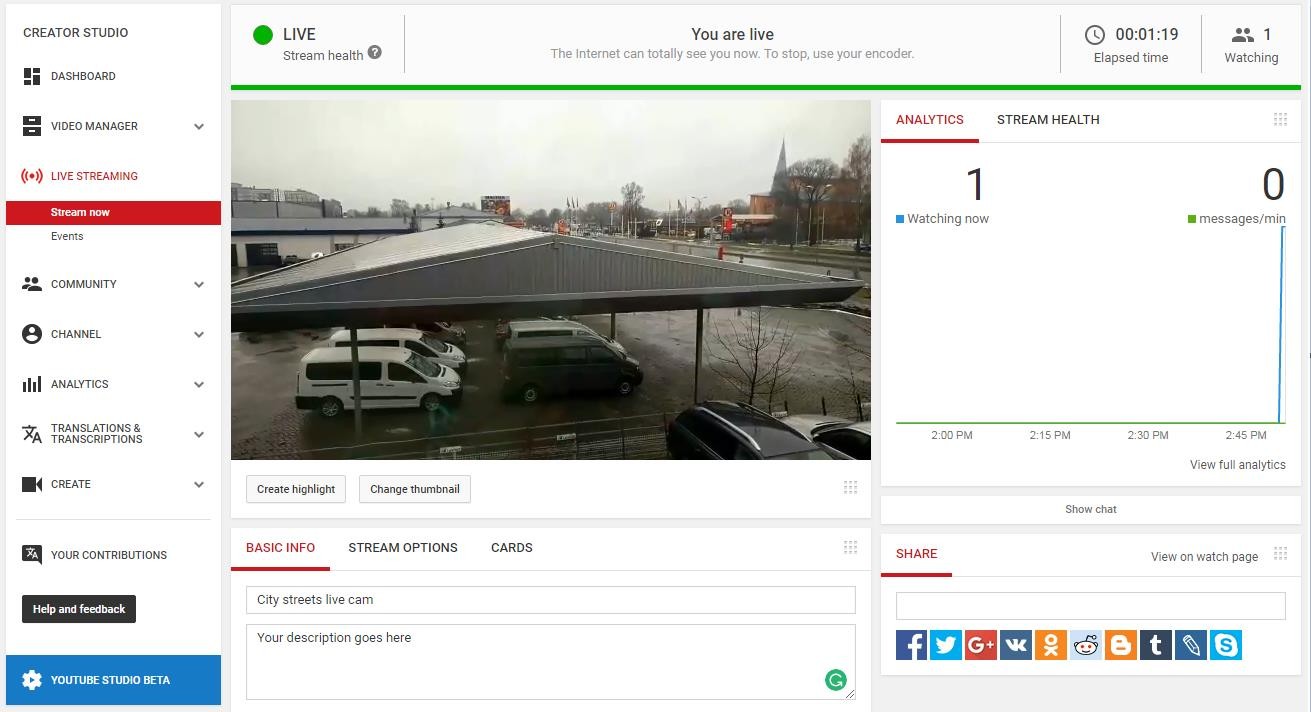
3. Save the settings by clicking the OK button. The podcast will appear in the list, and the streaming will start automatically after a few seconds (depending on the internet connection and YouTube service availability). You can check the streaming status on your YouTube page.
If you want to pause the streaming from Wavesys WVMS, use the “Disable/Enable” button in the upper panel of the “Live podcasts” section. If you stop the streaming for an extended period, keep in mind that YouTube may change the Stream name/key for security reasons after a certain timeout. In such cases, you will need to update the URL with the new code to resume streaming. To do this, use the “Edit” button in the upper panel or double-click on your podcast in the list.
Now, you can share the link and allow the world to view your live stream on YouTube!
Sorry, the comment form is closed at this time.